This level started out as a concept for a 2D platformer, but I changed it into a gray box for a 3rd person adventure game once I figured out exactly where I wanted to go with the idea. I wanted to toy around with the idea of a player having multiple paths to choose from to reach a goal, each having very different challenges to face. The Sonic games have utilized this multiple times and had great success with it. One path might be more dangerous, but offer the player a shortcut to the end so that they can achieve a higher score. Another path might have a red star hidden along it, giving the player reason to replay the level. Since this level is for a non-specific adventure game, it was designed assuming the player has no particular platforming skill besides a basic jump.

Helix is designed to be the inside of a tower. There are two ways to progress to the next floor; one path involving more combat, and the other more platforming. Depending on which combination of the paths is chosen, this level could lead to very different experiences for the player, and encourages both experimentation and multiple playthroughs.
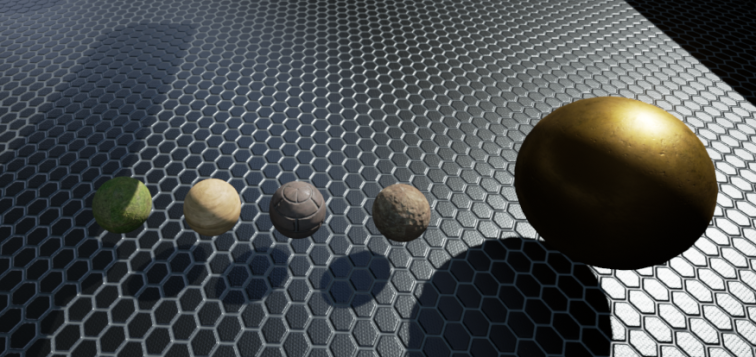
Since this is only a gray box, there is not a combat system or enemies to add into the level to test with. Therefore, I came up with a few theoretical enemy archetypes, designated by these spheres with materials attached to them. The grassy sphere on the left represents a standard grunt unit who focuses on melee attacks. The next sphere is for a weaker unit that sticks to attacking from the air. The third unit is a grunt like the first, but utilizes ranged attacks. The fourth sphere standards in for a higher class enemy that possesses more strength and vitality than standard grunt. For convenience, I’ll refer to give this unit as a knight. The final sphere represents the end of the level.
The player starts out on the ground floor of the tower. The box in the center is standing in for the player’s first objective. This may be an NPC or some type of item they need to collect. The main goal of this objective is to draw the player towards the center of the room. This is being guarded by a single melee enemy.
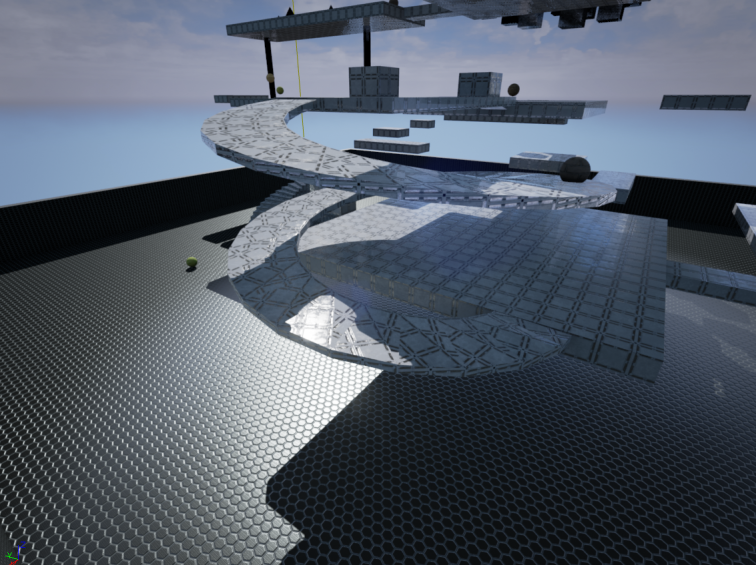
This view of the level from the ground floor is really what I’m hoping the player experiences at the beginning. I wanted them to get a feeling for the scale of the level, and how far they had to climb to reach the top.
On the combat path for the ground floor, the player ascends a flight of stairs to reach an open space where they encounter another melee grunt. A ranged grunt can be found on a ledge nearby. The player is capable of jumping to the ledge, giving them the option of either attacking the range grunt from afar, or rushing in close to deal with it.
Here’s another shot of the ranged grunt, and the path up to the second floor that the player will take after defeating them both. The aerial unit waiting along the upper path can also be seen from here.
From this angle you can see two aerial unit along the path to the second floor’s center. Since this is a gray box for a theoretical game, there aren’t any rules in place about whether enemies spawn when you draw close or always exist on the map. I think spawning when you draw close would be best to avoid a large number attacking the player when it is not intended.
Once you reach the second floor’s center, the player has to face a single knight. There are no set parameters for any of the units, but I would expect the knight to be much stronger than either grunt type of the aerial unit. After defeating the knight, the player is free to choose a path leading up to the third floor.
Back on the first floor, the player also the choice of a second path, which I’ll cover here. On the opposite end of the first floor is a curved staircase leading to the second floor guarded by a melee grunt. I labeled the paths as the combat and platforming paths based on their main obstacles, but that does not mean that only one of the two game systems will be utilized.
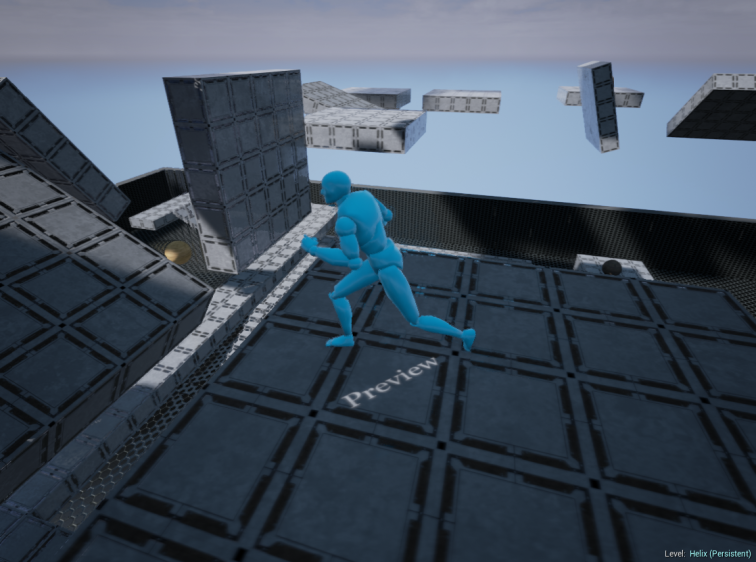
At the the top of the staircase, there are three small platforms for the player to navigate to in order to reach the second floor’s center. Since this route is certainly the less difficult one, it would also be the path with less rewards (items, experience, money, etc.).
For the combat path leading to the third floor, the player starts by navigating up a spiral pathway. Hidden along this pathway is a ranged grunt that begins firing on the player soon after they enter the spiral. The player may choose to return fire from below, but they could also try to rush up the spiral and deal with the unit up close.
At the top of the spiral is another ranged unit firing on the player, but this time from cover. With good reaction, the player can get to cover to avoid taking damage themselves. From there, it is up to them how they approach the enemy. After dealing with this ranged grunt, they reach the third floor’s center.
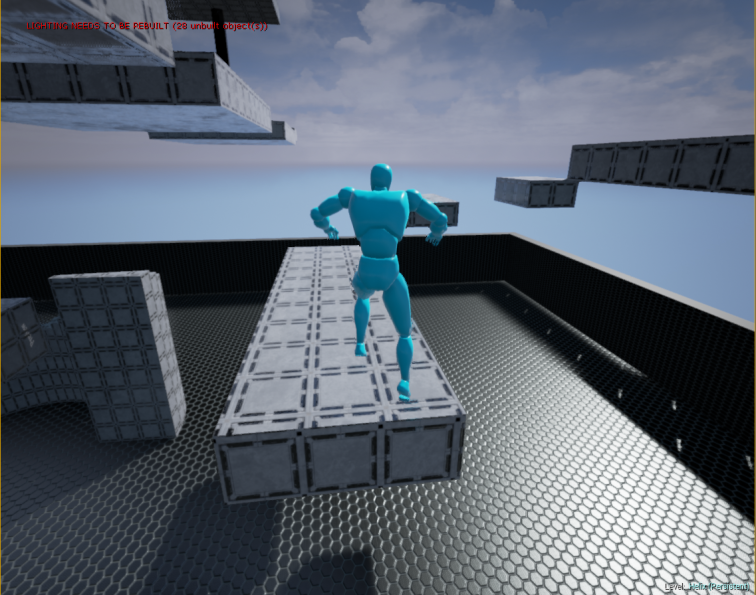
For the platforming route, the player has to navigate their way past a series of moving platforms. The platforms each have their own speed and path, so it’s up to the player to find the proper timing to make it from one to the next.
Here you see the player making it higher up in the tower and past the first set of jumps. It is around this point that the player needs to be concerned with fall damage. At the lower parts of the tower, the player could attempt platforming segments without consequence. Now, they need to be more precise, as they can only afford to miss a jump so many times. Fall damage scales with height, so this becomes more serious the higher up they go.
Once the player reaches the final pathway, they will release it is built collapsing pieces. These pieces will begin to fall soon after stepped on, so the player must quickly run before they all fall. They will respawn soon after falling, so if the player does not make it, they can retry this section .
At the third floor’s center is another knight. However, this battle takes place in a smaller room, leaving the player less room to navigate during the fight. After defeating the knight, the paths to the fourth floor will open.
For the platforming route, the player will have to make it past a series of rotating platforms this time. As with the previous floor, the platforms are not set at uniform speeds, directions, or lapses in between rotations. It will be up to the player to find the right time to jump from one platform to the next.
After every few platforms, there will one that is completely stationary. This is meant to give the player a chance to look ahead and plan their next series of jumps. At the end of rotating platforms is a moving platform that will bring the player up to the next floor.
A ranged grunt is protecting this next rest platform. It is up to the player whether they want to fire at the grunt from afar, reach the platform before fighting back, or skip past the enemy entirely and reach the end as quickly as possible.
On the fourth floor, the player has another series of rotating platforms to content with. At two points in the path, there are aerial units waiting for the player. Since they not are attached to any single platform, the player may be attacked on a rotating platform of a stationary rest platform.
In this shot, you can better see the locations of the two aerial units. After making it past these two, the player will reach the fourth floor’s center.
The combat route leading to the fourth floor begins the player jumping between two small platforms. Each platform contains a pole in the center that will cause damage on contact. This means that the player will have to navigate around it on an already small area of space. The first platform contains one melee grunt, and the second has one melee grunt and one aerial unit. After defeating all enemies, the player will find a moving platform that will take them up to the fourth floor.
On the fourth floor, the player has to fight one melee grunt and one ranged grunt in order to proceed. However, the platform has hazardous spikes scattered around, impeding the player’s movement and causing damage on contact. It will be up to the player to find a way around these obstacles and defeat the enemies. After making it past these enemies, the player will arrive at the fourth floor center.
In the fourth floor’s center, the player fight against two knights. They will have the same amount of space fight as they did during the encounter on the third floor’s center.
In the combat route leading up to the top floor, the player has a choice of two narrow walkways to use. There is a a ranged grunt on both paths, so the player will have to decide how they wish to deal with the two of them.
At the top of the two walkways waits two melee grunts and two aerial units. If either of the ranged units was not defeated earlier, they will follow player up the walkway and attack once they reach the top. This is the final gauntlet of enemies the player will face before reaching the top floor.
After making past those enemies, the player walks up the ramp to reach the top floor. The player may simply reach the top and end the level, or they may face a boss of some sort at the top of the tower.
For the platforming route, the player has to jump between hazardous platforms in order to reach the top. The platforms become hazardous at different intervals, so the player has to figure out where to jump to next before they take damage.
From this angle, you can see all of the hazardous platforms the player must navigate between. Rather than having a set path to follow, the player has to figure out where to jump to next in order to make it to the top.
At this height, the player will take quite a bit of fall damage from missing a jump. This adds to the tension the player feels from being so close to the end of the level. The goal is actually within line of sight, but one mistake and it’s all over.
Once they reach this point, the player just has to jump to the top floor’s center, and the level is complete.
Looking at the completed level, I think the concept of paths that focus on different game mechanics works out well. This level obviously lacks any way to test the balance of the paths because there are no enemies to fight. The one aspect of the level I am unsure of is the pacing. If this concept to be used in a production level, I would have more floors before the player reaches the top. I would do this not only to extend the length of the level, but also to lessen the difficulty curve between floors. Right now, the difficulty curve from one floor to the next seems rather high.


